These steps explain how to upload files to OneDrive and securely share them with users while ensuring correct permissions and an access end date.
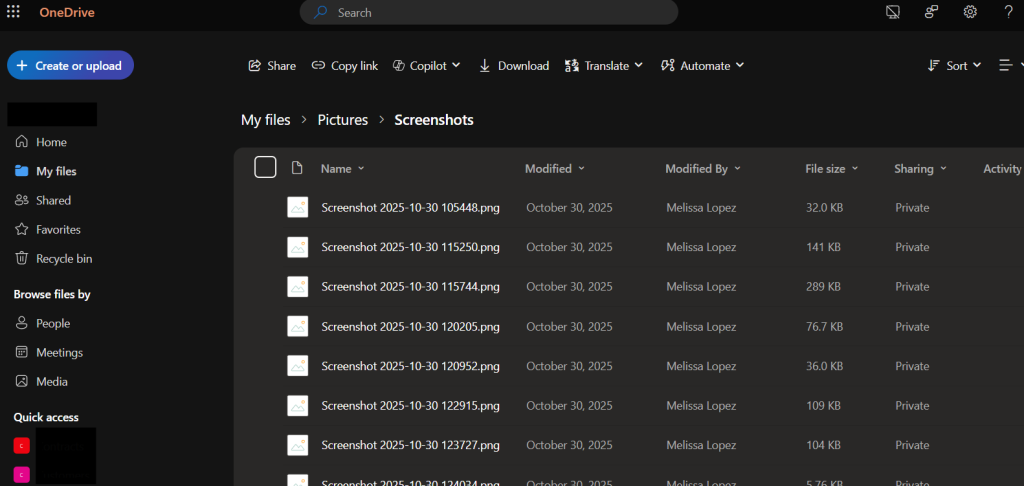
Upload Files to OneDrive
- Open OneDrive from Microsoft 365
- Sign in with your work account.
- Click Upload → select Files or Folder.
- Choose the file(s) and confirm they appear in OneDrive after upload.
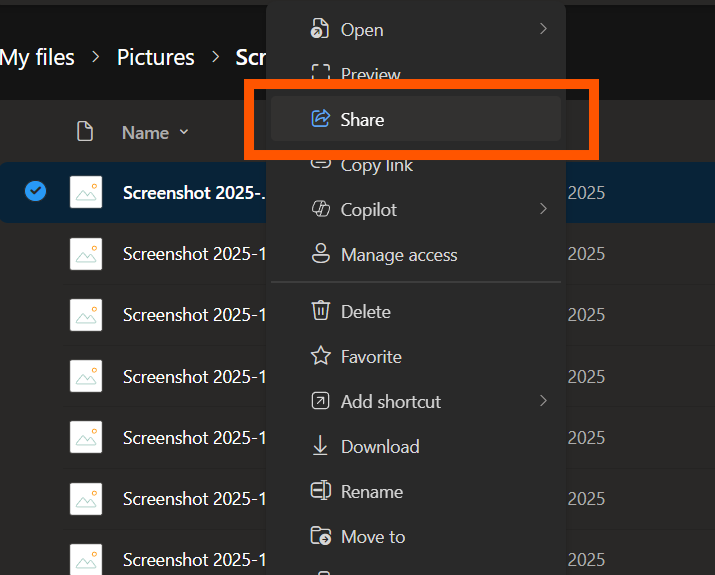
Share Files or Folders
- Right-click the file or folder.
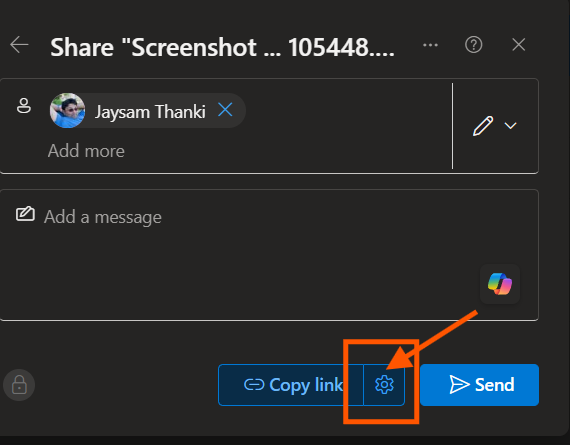
- Select ‘Share’.
- Click ‘Link settings‘ (gear icon).
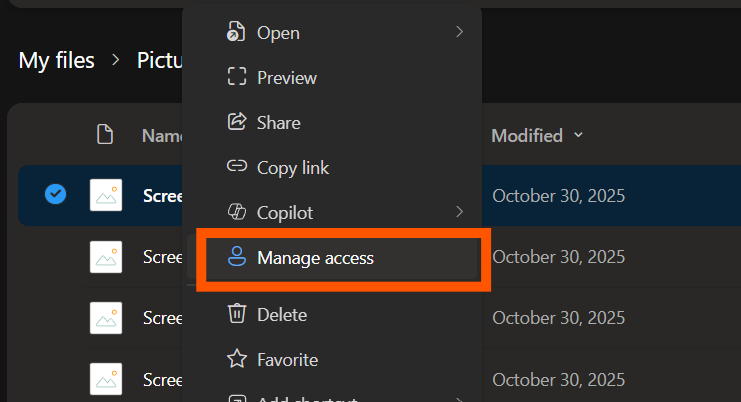
Configure Access Permissions
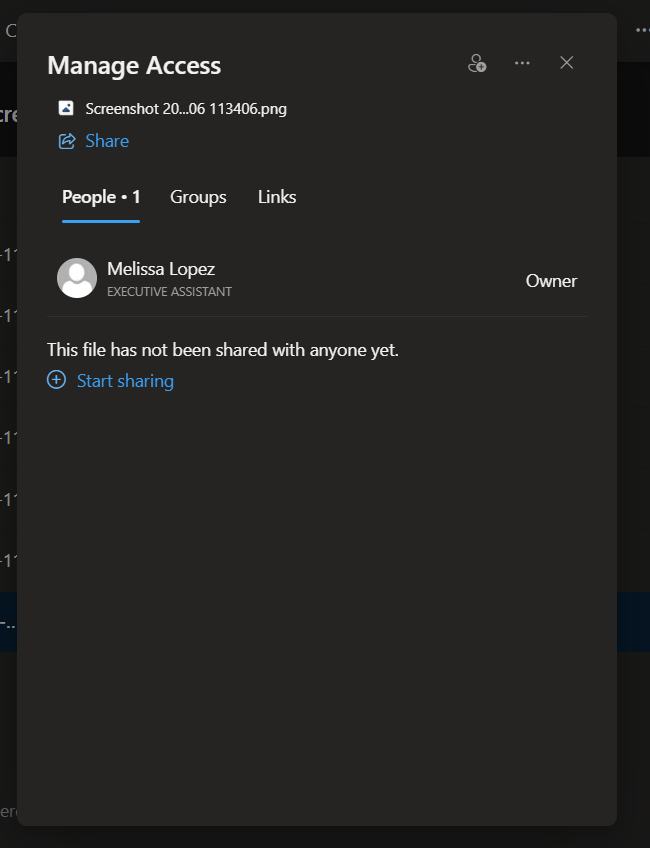
- Right-click on the file and click ‘Manage access’, then click ‘Share.’
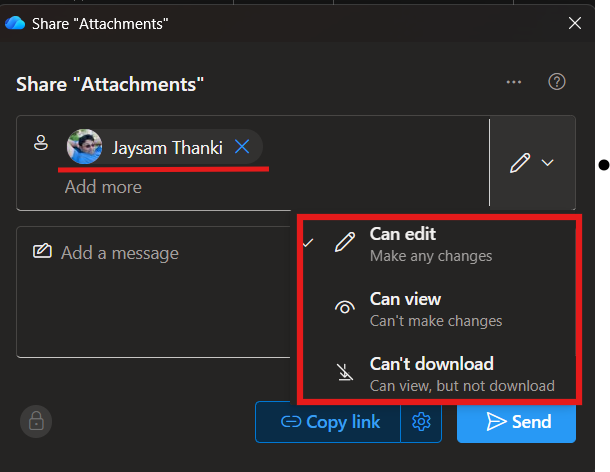
Send or Copy the Link
- Enter the recipient’s email address or click Copy link.
- Add a brief message if needed.
- Click Send.
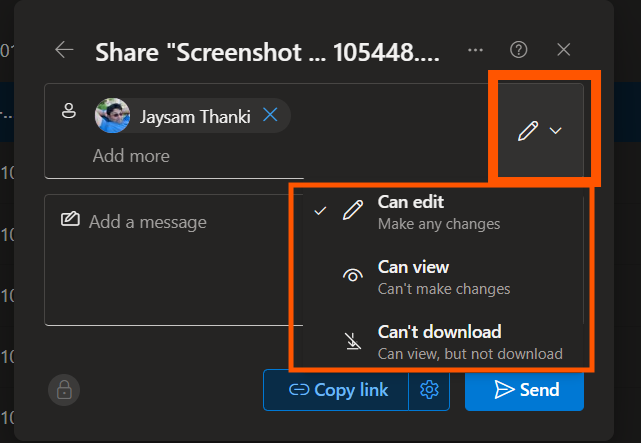
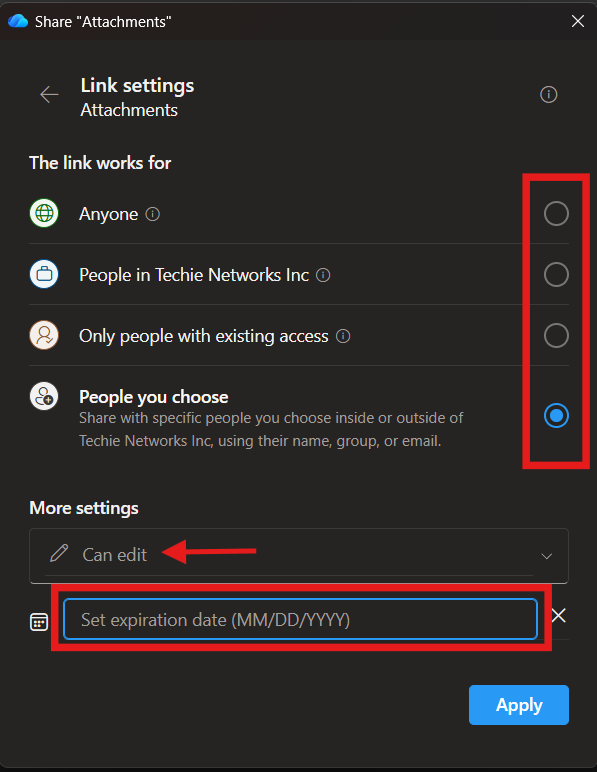
Select the appropriate permission:
- Can edit – allows changes
- Can view – read-only access

- Click on the ‘Link Settings’, which is the gear icon.
Update Settings

- For external users, select ‘Only people you choose’ if available.
- Enable ‘Block download’ if view-only access is needed.
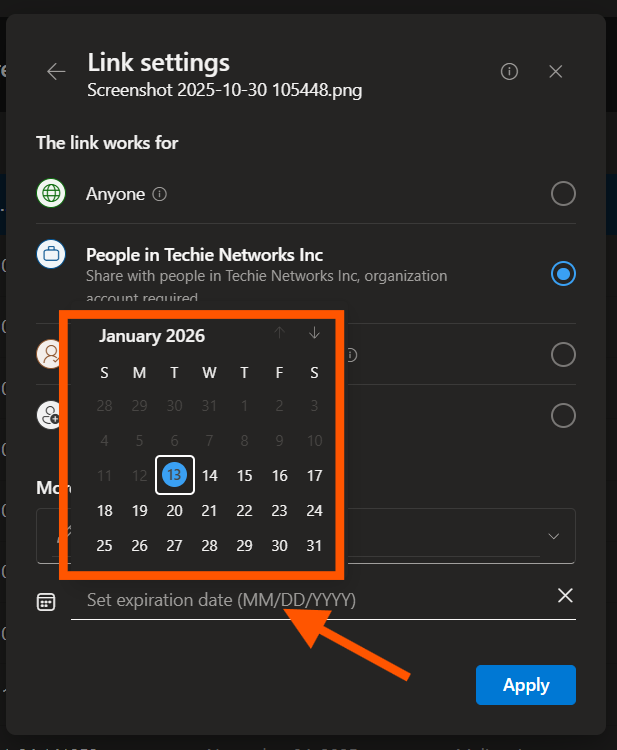
Access and Update the Expiration Date
- In Link settings, enable Set expiration date.
- Choose the date access should end.
- Click Apply.
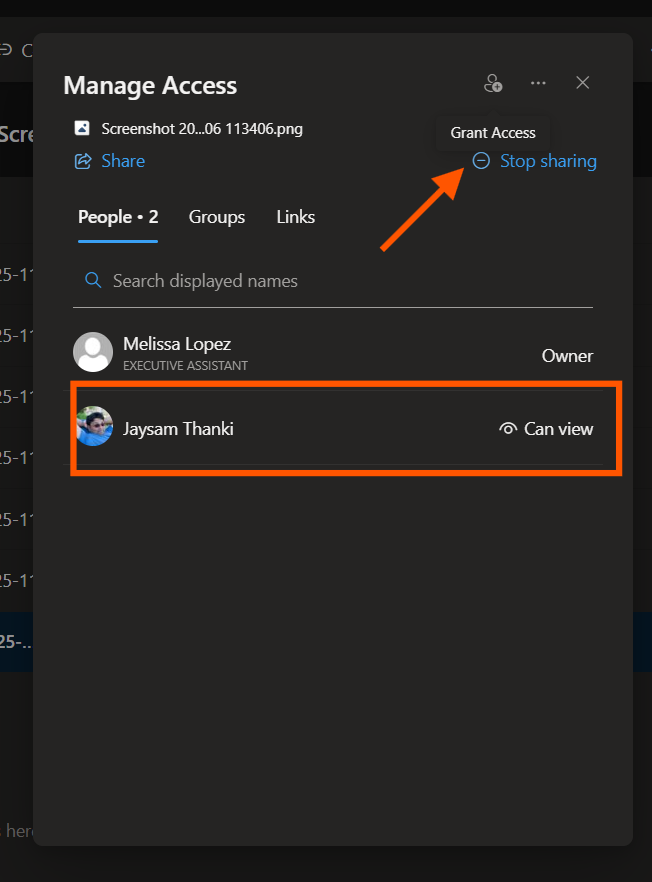
Verify or Remove Access
- Right-click the file or folder.
- Select Manage access.
- Confirm:
- User permissions (view/edit)
- Expiration date
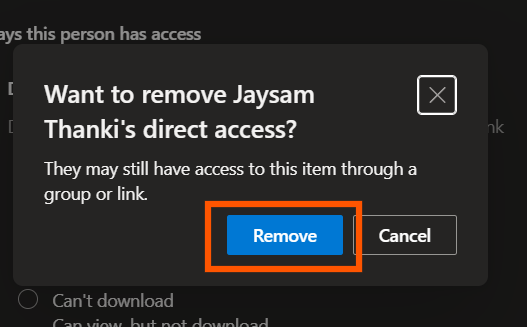
- Remove or modify access as needed.

How To- Share Files via File Explorer:
Users must be signed in to OneDrive on their computer in order to share files from File Explorer. If OneDrive is not signed in or syncing, sharing options may be missing or fail.
These steps explain how to add files to OneDrive using Windows File Explorer and securely share them while ensuring proper permissions and an access expiration date.
Uploading & Sharing Files in OneDrive via File Explorer
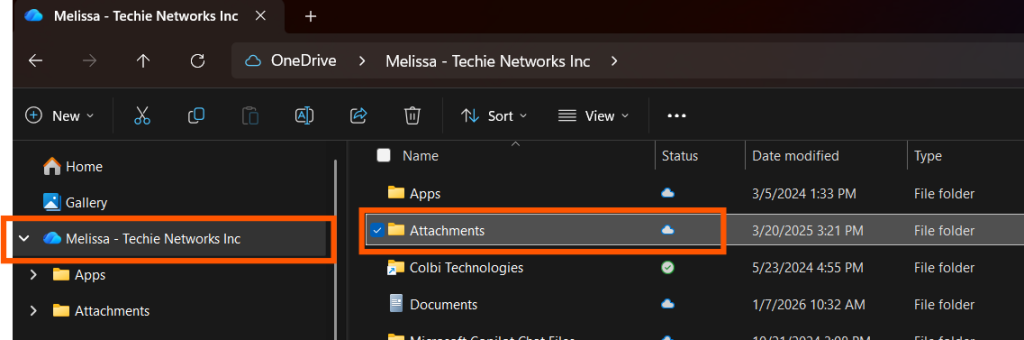
- Open File Explorer.
- Select OneDrive from the left navigation pane. Your name and company may be listed, as shown in the photo below.
- Drag and drop files or folders into the desired OneDrive folder.
- Wait for the sync status icon (green checkmark or cloud) to confirm the upload is complete.
- If it’s showing a spinning blue circle, please wait for it to turn into a green checkmark.
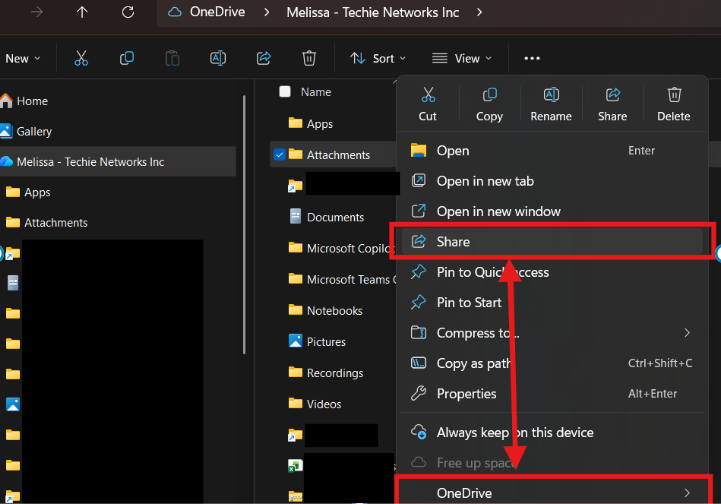
Share Files or Folders from File Explorer
- Right-click the OneDrive file or folder.
- Select Share (or OneDrive → Share depending on Windows version).
- The OneDrive sharing window will open.
Configure Access Permissions
- Click Link settings (gear icon).
- Select the appropriate permission:
- Can view – read-only access
- Can edit – allows changes
- Choose Only people you choose if available (recommended for external users).
- Disable Allow editing unless required.
- Enable Block download for view-only access if applicable.
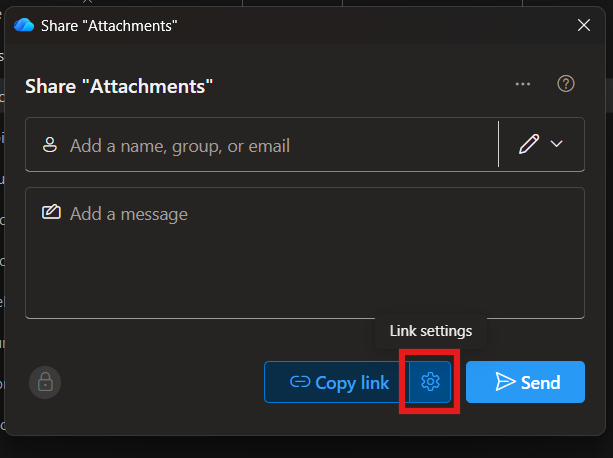
Send or Copy the Share Link
- Enter the recipient’s email address or select Copy link.
- Add a brief message if needed.
- Click Send.
Verify or Manage Access
- Right-click the file or folder in File Explorer.
- Select OneDrive → Manage access.
- Confirm:
- User permissions (view/edit)
- Expiration date
- Remove or update access as needed.
Notes / Best Practices
- Ensure files are fully synced before sharing.
- Always aim to use expiration dates for external users.
- Avoid ‘Anyone with the link’ unless approved.
- Review access regularly for sensitive files.
Comments are closed